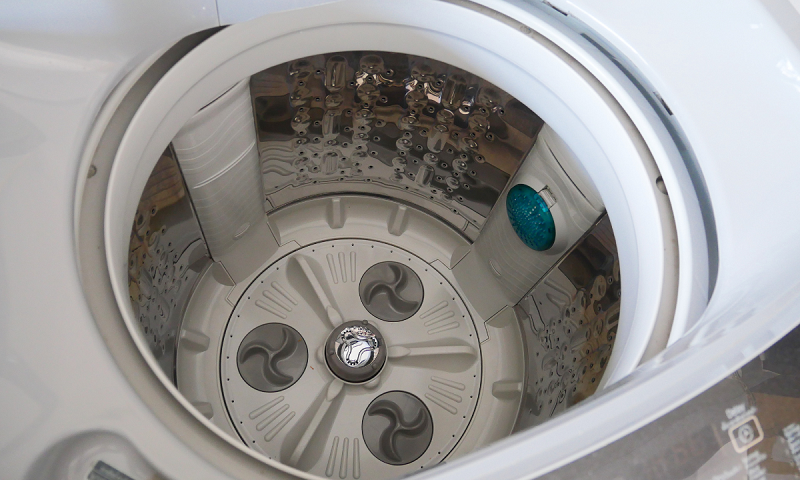
Among the problems that may occur in washers, water leakages are found to be the most commonly found issue. Either the water leaks on the outside of the machine or you can find it leaking inside the tub.
GE washers are also facing the issue of water dripping inside the tub. This dripping will eventually fill the tub unnecessarily even when you haven’t turned on the machine. So, it must be fixed to avoid the wastage of water and to avoid unnecessary leaks.
Find out the reasons and fix for the GE washer that has water dripping inside its tub from this blog post.

Why is my GE Washer Dripping Water Inside?
Your GE washer drips water inside the tub due to the failure of the water inlet valve. You can rectify it by replacing the water valve. Both front-loading and top-loading washers can have this issue and you can simply replace the inlet valve and stop the leaking.
The only reason for the leak is the failure of the water inlet valve because the inlet valve is a solenoid-controlled valve that opens only when an electrical signal is passed on to it. So, if you find your washer tub filled with water even when you haven’t turned on your machine, then the valve has got some issues.
Repairing the valve is possible but replacing it is better since you can get long life with a new replacement part than repairing the valve.
Let us now look at the complete procedure to replace a water valve in both front loading and top-loading GE washing machine.
Water Inlet Valve Replacement for GE Top Load Washers
Replacing the water inlet valve is quite an easy task if you follow the procedure properly. Here are the steps you must follow:
- First of all, find out the model of your washer and order the relevant spare part from the manufacturer. You can find the model number on the washer itself or you can find it in the user manual. Once you receive the part, you can go for a replacement.
- Turn off the washer and remove the plug from the electrical socket
- Turn off the water valve from the main line so that it doesn’t supply water to the washer
- Now, you can find two tubes supplying hot and cold water from the main valve to the washer at the rear end. You have to remove them from the washer. You can simply unscrew them with your hand or you can use some spanners or pliers for assistance. Residual water from the tube might come out, therefore, be prepared for spillage.
- Once you remove these tubes from the washer, locate the screws holding the back panel at the left and right end. Unscrew them and remove the back panel completely.
- Now you can remove the control panel at the back by sliding it towards you and then lifting it. Be careful with this step because you might break or damage the panel and wires connecting them.
- Once you lift the panel off, remove the harness plugs from the water valve assembly and keep them aside.
- You can find two screws and a thermistor holding the water valve in place. Using a screwdriver, remove the screws and gently lift off the thermistor from the place.
- After removing them, the water valve can be removed by gently pushing it downwards on the inside and sliding it out towards you.
- Now, take the new replacement water valve assembly and slide it in the same manner you removed it.
- Replace both the screws and thermistor in place properly.
- Insert the harness wires back and replace the control panel, and back panel in the same manner you removed them earlier.
- Now you can connect the water line to the new water valve and use the washer without any issues.
Water Inlet Valve Replacement for GE Front Load Washers
The procedure is slightly different than top load washers and you must follow it properly to easily replace the valve.
- First of all, find out the model of your washer and order the relevant spare part from the manufacturer. You can find the model number on the washer itself or you can find it in the user manual. Once you receive the part, you can go for a replacement.
- Turn off the washer and remove the plug from the electrical socket
- Turn off the water valve from the main line so that it doesn’t supply water to the washer
- Now, you can find two tubes supplying hot and cold water from the main valve to the washer at the rear end. You have to remove them from the washer. You can simply unscrew them with your hand or you can use some spanners or pliers for assistance. Residual water from the tube might come out, therefore, be prepared for spillage.
- Then, locate the screws holding the top panel in your front load washer. They are usually located in the top four corners of your washer.
- Unscrew them with a screwdriver and remove the top panel. You can now look at the inner part of your washer.
- You can find three tubes connecting to the front from the water inlet valve. Now go to the rear end of the washer and you can find two screws holding the inlet valve.
- Unscrew them and detach the water inlet valve from the rear panel. Then keep this old valve aside.
- Take the new replacement water valve and place it in the rear panel like the previous one and screw it in place.
- Now remove the three tubes from the old valve and also the harness wires powering the valve.
- Connect the tubes and wires to the new valve. Then replace the top panel and screw it in place.
- Replace the water tubes to the inlet valves and start using the washer as usual.
These are the procedures to replace water inlet valves in GE washer models. Follow this procedure completely to perform a hassle-free replacement and prevent water from leaking inside the tub.
Conclusion
Water leaking inside your washer tub can be easily rectified with this simple replacement technique. Since the valve is the only cause for dripping water inside, you can use this method to replace the valve and solve the issue.


